Importing from mSecure into DataVault
Data stored in mSecure can be imported directly into DataVault by following the instructions below.
Exporting from mSecure
Install mBackup from mSeven Software from the URL found below.
http://www.msevensoftware.com/mbackup.html
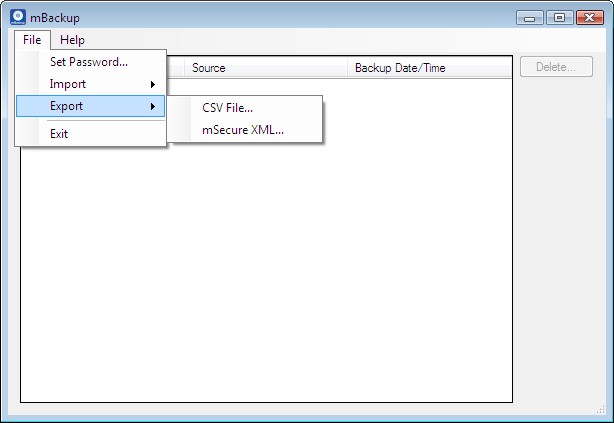
Start mBackup and select File > Export > CSV File… from the text menu, see image below.
Importing into DataVault
Download and install
DataVault for Windows with free trial period.
Select Tools > Import > CSV > mSecure... from the DataVault for Windows menu, see red arrow in screen shot below.
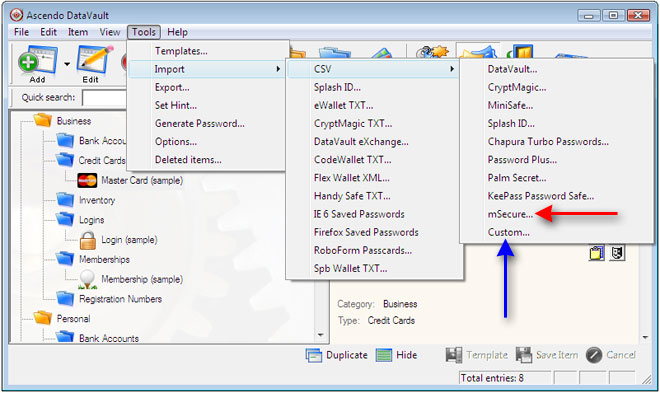
If the mSecure file format has changed since the writing of this guide, it may be necessary to do a custom import of your data.
Custom Import
The DataVault custom importing tool provides a way to map fields from mSecure to their correct positions in DataVault. To do this, start DataVault Desktop and select Tools > Import > CSV > Custom... from the text menu, see blue arrow in DataVault for Windows image above.
Select field values as they appear in the Import from CSV screen below.

Due to limitations in mSecure and mBackup, some of information managed by DataVault cannot be imported.
- mSecure supports only 6 fields per item. DataVault supports 10. To set fields 7 to 10 to blank, click on the field contents then click on the delete key.
- mSecure does not support 2 levels of categorization so the Category field must be set to Unfiled.
- mSecure forces field labels to be the same for all types. DataVault allows you to set them independently. Because of this, you must set the field names to blank by clicking on the field name contents and clicking on the delete key.
- The notes in mSecure are not in the same position in the CSV file for every record. As a result, the notes field will appear in Field5 or Field6 and must be copied manually to the Notes field in DataVault.
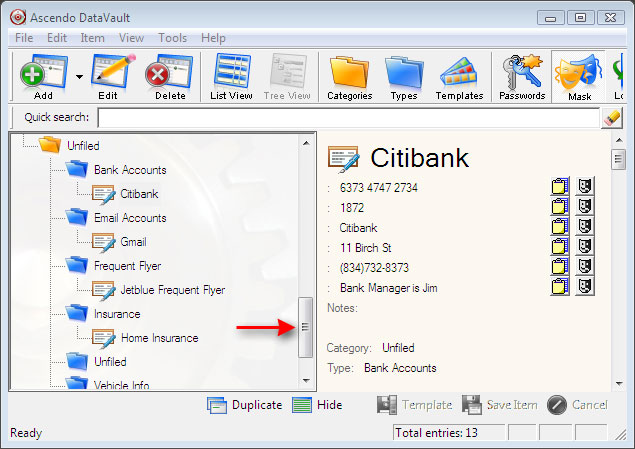
When
you click on the Ok button, DataVault will import the records into the
Unfiled Category of the DataVault Desktop. Please note that you must
scroll to the bottom of the left hand panel of
DataVault to see the imported records, see red arrow pointing to scroll bar
in the image below.
Once your items are in Ascendo DataVault Desktop, you may want to edit them as follows.
- To move a type to a different category folder, click on type name then drag & drop it over a category name.
- To move an item to a different type folder, click on the item name then drag & drop it over a type name.
- To change an item icon, double-click on item name, then click on icon and select from the icon matrix.
- To move field contents to notes, double-click on item name, then click on notepad icon to right of field, then right click anywhere in Notes field and select Paste from the context menu.
When the imported items have been formatted to your liking, you can move them to your handheld by following the instructions for
synchronization in the DataVault User Guides.
If you have any questions, email to datavault@ascendo.co